This Roti Fita recipe has been on my to do list for aaaages and was highly requested, so I’m really pleased to finally be sharing it with you all.
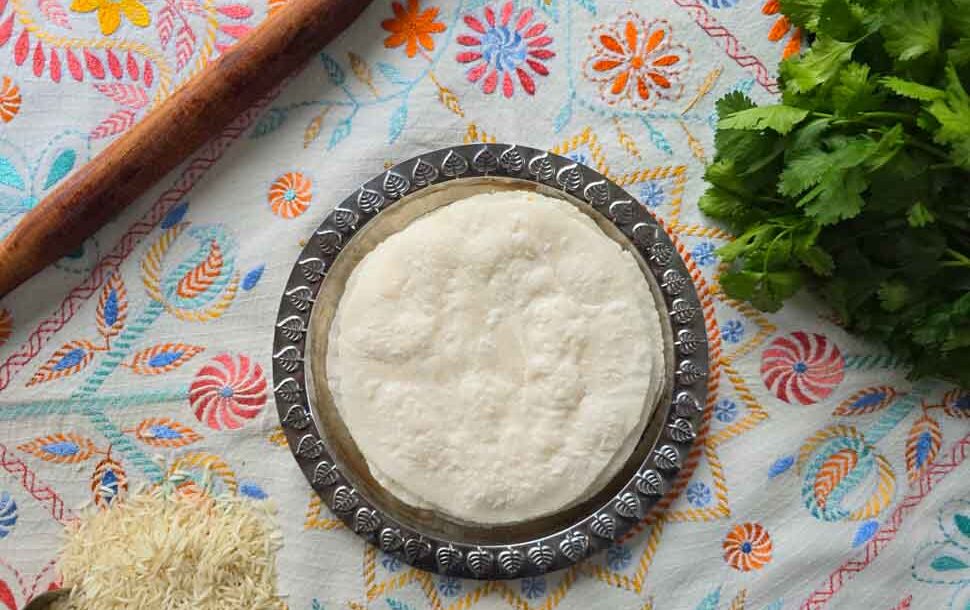
Roti Fita are flatbreads made from rice flour and are very popular amongst Bengalis. They are often made for special occasions such as Eid Al Fitr and Eid Al Adha, as part of the Eid spread. They are enjoyed with things like Beef Bhuna or a Classic Lamb & Potato Curry, or any sort of saucy meat or chicken dish. Being quite labour intensive, they are considered a treat; traditionally the rice flour would have been ground down to a fine powder by hand, nowadays people just use ready made rice flour which makes the whole process a lot easier. You can use any brand of rice flour, but do make sure you are using rice flour and not ground rice which is coarser and requires more water to cook through.
The Roti Fita are made from a simple dough of water, salt and rice flour and you’d be right to think that there isn’t much to the recipe since it uses just a handful of ingredients. Wrong! It’s one of those recipes that seems so easy when watching others make it, but when you attempt it yourself, it goes horribly wrong (and yes, I’m speaking from personal experience here lol). Being made of rice flour, these Roti Fita are naturally gluten free and suitable for a gluten free diet. They are typically smaller in size when compared to other types of flatbreads and are also vegan/vegetarian.
In the past I used to believe it was simply getting the amounts accurate that was the key, and whilst measurements are important, I think technique and what you do to the dough plays an even more important role. So I’m fairly confident that no matter what your level of experience is in the kitchen, YOU can attempt these Roti Fita with good results and improve on them every time you make them if you follow my handy tips. So without further ado, let’s get started!
Roti Fita (makes about 12 – 14 small rotis)
You will need: for Roti Fita
1.5 cups water (approx 325ml)
2 cups rice flour (approx 240g)
1/2 tsp salt
extra rice flour (for rolling rotis)
Method:

Step 1 – Add 1.5 cups (approx 325ml) of cold water to a pan, place the lid on top and bring to a boil, placing the lid over the top is important so the amount of water lost through evaporation is minimal. Once it comes to a rolling boil, add 1/2 tsp of salt and stir to dissolve.

Step 2 – Add 2 cups of rice flour (approx 240g), stir using a wooden spoon and cover. Cook for 5 mins on the lowest heat setting.

Step 3 – Cool the dough – spread out onto a counter or into a wide shallow bowl with raised sides and leave to cool for 10 minutes.
Fill a small bowl with cold water, this will be used to dip your fingers into as you knead the dough to keep your hand cool and also add a little moisture back to the dough mixture as you knead it (since it loses moisture as it cools). Adding a little water to the dough this ways prevents you from adding too much in one go and spoiling the batch, it gives you a lot more control.
Whilst the dough is still warm, start to knead the dough, it may be a little sticky at first but continue kneading it, dipping your hand into the cold water as you go to help bring the mixture together, use a blunt knife to scrape off any bits that stick to your hand. If your dough is very sticky, add a little rice flour to it (although this shouldn’t be the case).

Step 4 – Once the dough begins to come together to form a ball, place it on the counter, set a timer and knead it for a full 5 mins – this step is REALLY important to ensure that your dough is smooth and the right consistency, it also ensures your rotis puff up when cooking so DO NOT skip this step.
You can also do this in a food processor using the dough blade, process until the dough is smooth and can be rolled into a ball without sticking to your hands.
The dough is ready when it stops sticking to your hand and is malleable. Shape the dough ball into a cylinder.

Step 5 – Cut the cylinder into two halves. To stop the half you won’t be working on from drying out, wet a cotton cloth under the tap and wring out the excess water, place this over the top to keep it moist.
Now roll the other half into a thin sausage like cylinder and divide this into six or seven equal pieces, this will be the number of rotis you make from this half. Place the pieces of dough you aren’t working on under the damp cloth to stop them drying out.

Step 6 – Working on one piece at a time, roll the dough into a round ball.
Flatten the round ball into a round disc, dip in rice flour on both sides, roll out using a rolling pin. You want the rotis to be the thickness of a mini tortilla, if they are too thick they will not puff up as they cook.

Step 7 – Roll out several rotis together, they cook quickly and you need to keep an eye on them as they cook. Also try not to use too much rice flour when rolling them out, as this sticks to the pan and burns easily.
You can use a tawa for cooking the rotis, I am using a cast iron pan as this heats up and retains heat well which makes cooking the rotis easier. Always add your rotis to a hot pan, hold your hand above the pan and if you can feel the heat rising the pan is ready, do not do this on a non stick pan since it can release toxins when it overheats.
Place the roti on the hot pan, flip every 20 – 25 seconds, counting in your head is the best way to keep track of time.

Step 8 – You will slowly start to see small bubbles forming on the roti, keep flipping every 20 – 25 seconds and cooking evenly, press gently on areas where there aren’t any bubbles to help them puff up.
If your rotis don’t fully puff up, don’t worry, as long as they are cooked fully on both sides and you follow the next few steps, they will still turn out perfect.

Step 9 – After cooking the Roti Fita place them in a lidded dish with a clean tea towel inside, the lid will trap the excess steam from the hot rotis and the tea towel will absorb the excess moisture, this helps keep the rotis soft and hot without going soggy.
Carry on cooking the rotis in this way. With a clean cloth or paper towel wipe away any excess rice flour that sticks to the pan as this can burn easily and discolour your rotis.
As I build up the pile of Roti Fita, I always place the top roti into the middle, I find the steam from the roti hot off the pan softens the remaining rotis (I do the same thing for chapatis too), remember to keep them all covered.

Step 10 – Enjoy your hot Roti Fitas with your choice of curry, they are best served on the day. In addition to the Beef Bhuna and Classic Lamb & Potato Curry, you may want to try serving the Roti Fita with any the following dishes; Boneless Chicken Curry, Khodur Niramisha or this delicious Tadka Daal,
If you do have leftover Roti Fita, I would advise freezing them and placing them in a resealable freezer bag. To reheat place them on a tawa/cast iron pan from frozen, keep flipping until soft and hot all the way through.

- 1.5 cups water (approx 325ml)
- 2 cups rice flour (approx 240g)
- ½ tsp salt
- extra rice flour (for rolling rotis)
- Step 1 - Add 1.5 cups (approx 325ml) of cold water to a pan, place the lid on top and bring to a boil, placing the lid over the top is important so the amount of water lost through evaporation is minimal. Once it comes to a rolling boil, add ½ tsp of salt and stir to dissolve.
- Step 2 - Add 2 cups of rice flour (approx 240g), stir using a wooden spoon and cover. Cook for 5 mins on the lowest heat setting.
- Step 3 - Cool the dough - spread out onto a counter or into a wide shallow bowl with raised sides and leave to cool for 10 minutes.
- Fill a small bowl with cold water, this will be used to dip your fingers into as you knead the dough to keep your hand cool and also add a little moisture back to the dough mixture as you knead it (since it loses moisture as it cools). Adding a little water to the dough this ways prevents you from adding too much in one go and spoiling the batch, it gives you a lot more control.
- Whilst the dough is still warm, start to knead the dough, it may be a little sticky at first but continue kneading it, dipping your hand into the cold water as you go to help bring the mixture together, use a blunt knife to scrape off any bits that stick to your hand. If your dough is very sticky, add a little rice flour to it (although this shouldn't be the case).
- Step 4 - Once the dough begins to come together to form a ball, place it on the counter, set a timer and knead it for a full 5 mins - this step is REALLY important to ensure that your dough is smooth and the right consistency, it also ensures your rotis puff up when cooking so DO NOT skip this step.
- You can also do this in a food processor using the dough blade, process until the dough is smooth and can be rolled into a ball without sticking to your hands.
- The dough is ready when it stops sticking to your hand and is malleable. Shape the dough ball into a cylinder.
- Step 5 - Cut the cylinder into two halves. To stop the half you won't be working on from drying out, wet a cotton cloth under the tap and wring out the excess water, place this over the top to keep it moist.
- Now roll the other half into a thin sausage like cylinder and divide this into six or seven equal pieces, this will be the number of rotis you make from this half. Place the pieces of dough you aren't working on under the damp cloth to stop them drying out.
- Step 6 - Working on one piece at a time, roll the dough into a round ball.
- Flatten the round ball into a round disc, dip in rice flour on both sides, roll out using a rolling pin. You want the rotis to be the thickness of a mini tortilla, if they are too thick they will not puff up as they cook.
- Step 7 - Roll out several rotis together, they cook quickly and you need to keep an eye on them as they cook. Also try not to use too much rice flour when rolling them out, as this sticks to the pan and burns easily.
- You can use a tawa for cooking the rotis, I am using a cast iron pan as this heats up and retains heat well which makes cooking the rotis easier. Always add your rotis to a hot pan, hold your hand above the pan and if you can feel the heat rising the pan is ready, do not do this on a non stick pan since it can release toxins when it overheats.
- Place the roti on the hot pan, flip every 20 - 25 seconds, counting in your head is the best way to keep track of time.
- Step 8 - You will slowly start to see small bubbles forming on the roti, keep flipping every 20 - 25 seconds and cooking evenly, press gently on areas where there aren't any bubbles to help them puff up.
- If your rotis don't fully puff up, don't worry, as long as they are cooked fully on both sides and you follow the next few steps, they will still turn out perfect.
- Step 9 - After cooking the Roti Fita place them in a lidded dish with a clean tea towel inside, the lid will trap the excess steam from the hot rotis and the tea towel will absorb the excess moisture, this helps keep the rotis soft and hot without going soggy.
- Carry on cooking the rotis in this way. With a clean cloth or paper towel wipe away any excess rice flour that sticks to the pan as this can burn easily and discolour your rotis.
- As I build up the pile of Roti Fita, I always place the top roti into the middle, I find the steam from the roti hot off the pan softens the remaining rotis (I do the same thing for chapatis too), remember to keep them all covered.
- Step 10 - Enjoy your hot Roti Fitas with your choice of curry, they are best served on the day. In addition to the Beef Bhuna and Classic Lamb & Potato Curry, you may want to try serving the Roti Fita with any the following dishes; Boneless Chicken Curry, Khodur Niramisha or this delicious Tadka Daal,
- If you do have leftover Roti Fita, I would advise freezing them and placing them in a resealable freezer bag. To reheat place them on a tawa/cast iron pan from frozen, keep flipping until soft and hot all the way through.

