I don’t think any kind of cake quite compares to a home made one. There is something about a simple home baked vanilla sponge that’s absolutely heavenly; the light, buttery, crumbly sponge, layered with fresh whipped cream and jam makes for an irresistible masterpiece in my opinion. I always prefer to bake a small cake for special occasions like birthdays and family gatherings rather than order a cake. In my experience a home made cake doesn’t go to waste, every last scrap get eaten! My children love when I bake for them and I try to bake whenever I have a family gathering, so I’m not left to eat all those glorious calories on my own.
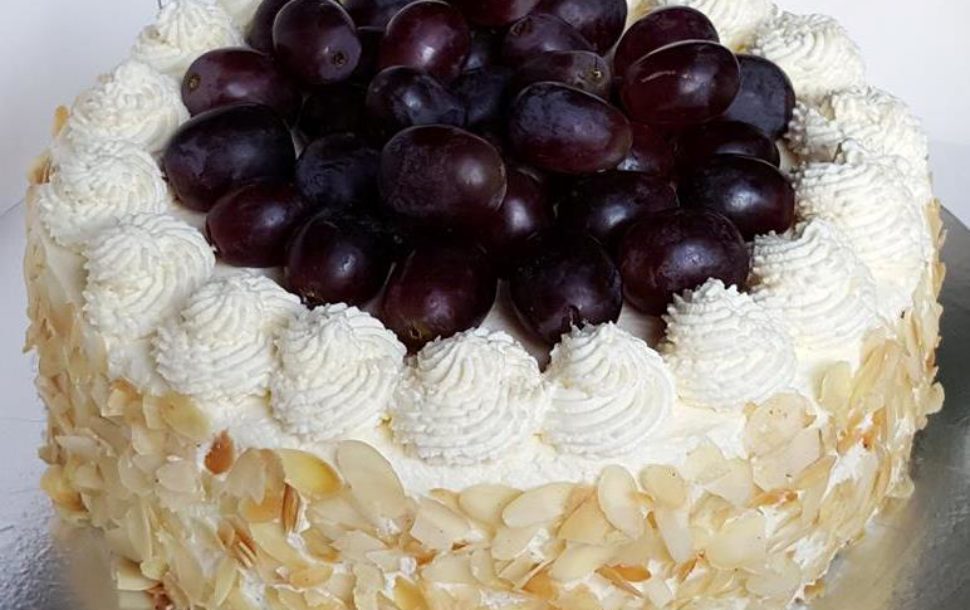
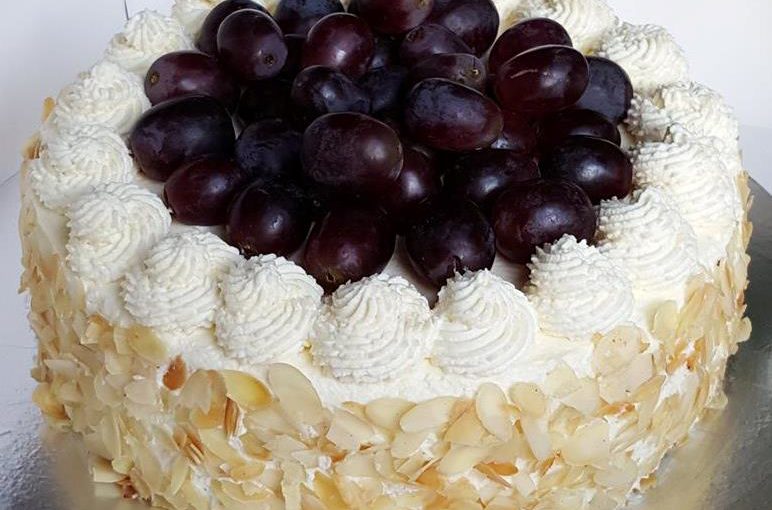
For this particular cake I chose not to layer the middle with jam and opted for chocolate hazelnut spread instead, as one of my boys doesn’t like jam. I used sliced almonds to decorate the exterior and placed grapes on top. If you have a nut allergy you may replace the almonds with chocolate sprinkles or leave it plain. You may want to use a different fruit or use a selection of tropical fruits which not only tastes amazing but looks stunning. The possibilities are endless, the only question now is, how will you bake yours?
You will need: for Fresh Cream & Fruit Sponge Cake
200g butter
200g sugar + 4 tbsp (for whipping cream)
4 medium sized eggs
2 tsp vanilla essence
200g self raising flour
2 tsp baking powder
generous pinch of salt
1/2 cup of sliced almonds
2 pots of double cream (my pots were 250ml each)
chocolate hazelnut spread
fresh punnet of grapes OR fruit of your choice
Method:
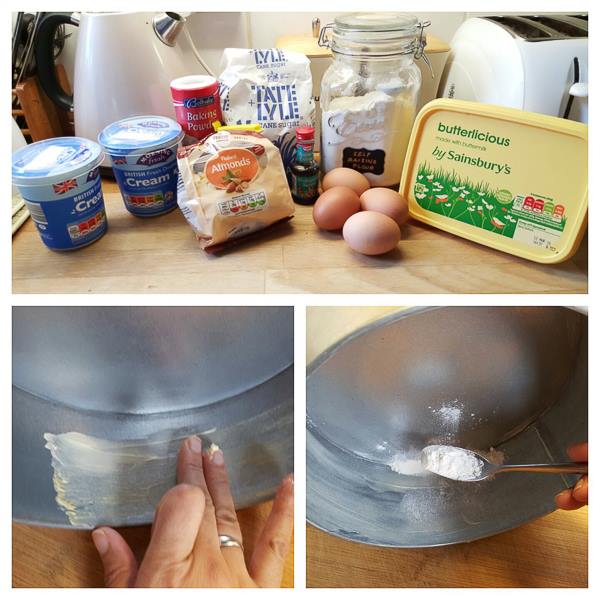
Start by preheating your oven to gas mark 4. Using your fingers grease the inside edge of an 8 inch cake pan with some butter. Take a small spoon of plain flour and gently coat the buttered surface, tap the tin to ensure you reach all the buttered area. I use greaseproof paper for the bottom of my cake as it gives a clean edge to the finished cake if you don’t have greaseproof paper, grease and flour the bottom of your cake pan also.
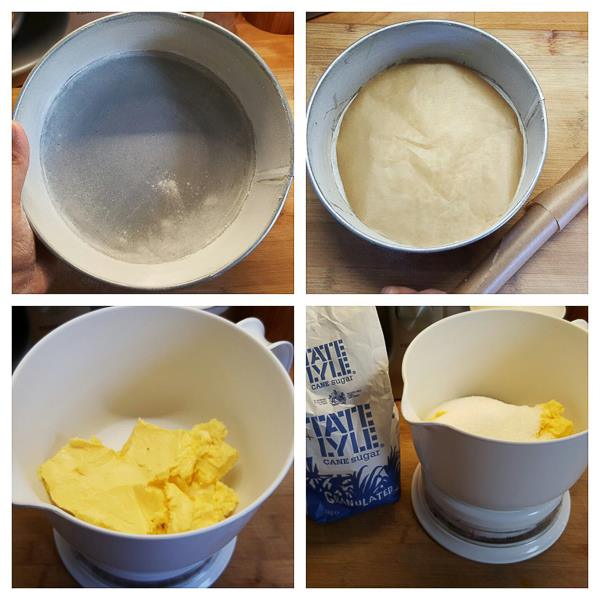
This is what the greased and floured cake tin will look like (top left photo). Cut out a circle of greaseproof paper using the base of your cake tin as a guide. Measure 200g of butter and 200g of sugar.
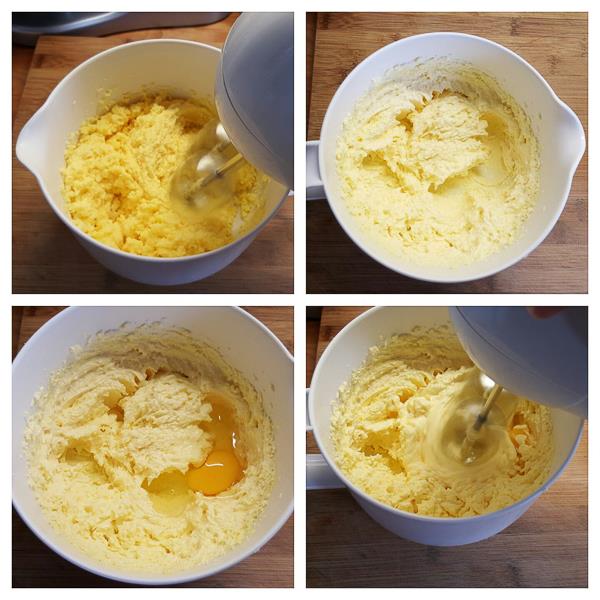
Cream the butter and sugar together till soft, you shouldn’t be able to feel the grittiness of the sugar.
Add in the 4 eggs, one by one and thoroughly combine before adding each egg.
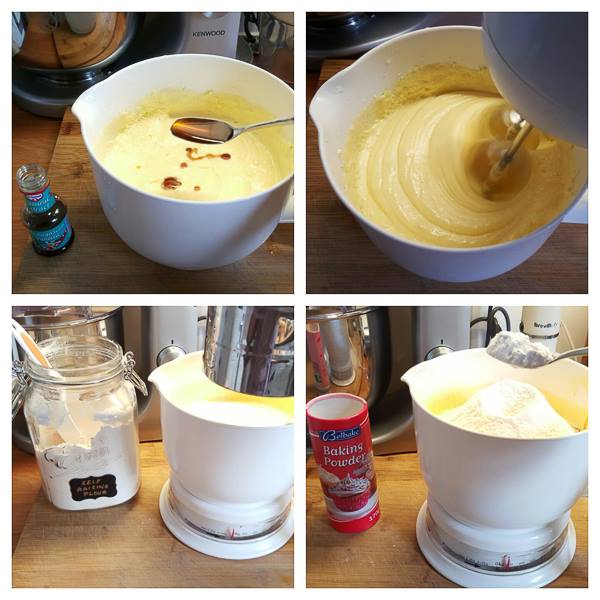
Add 2 tsp of vanilla essence, mix well.
Next sift in 200g of self raising flour and add 2 tsp of baking powder.
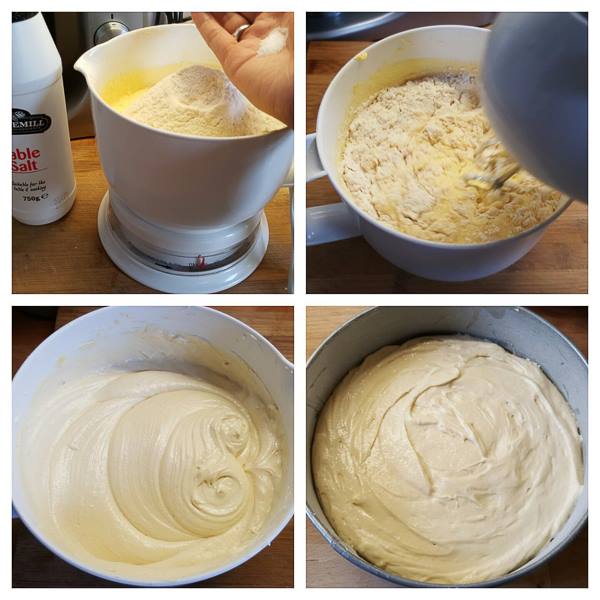
Add a generous pinch of salt. With your handheld mixer turned off, stir in the flour, once most of the flour has been absorbed turn the mixer on and whisk thoroughly till you have a smooth batter (bottom left photo).
Pour your cake batter into your cake tin; the cake tin I am using measures 8 inches wide and 3 inches high. Bake the cake in your preheated oven on gas mark 4 for approximately 40 – 50 minutes. The cake is cooked when a toothpick comes out clean from the centre of the cake.
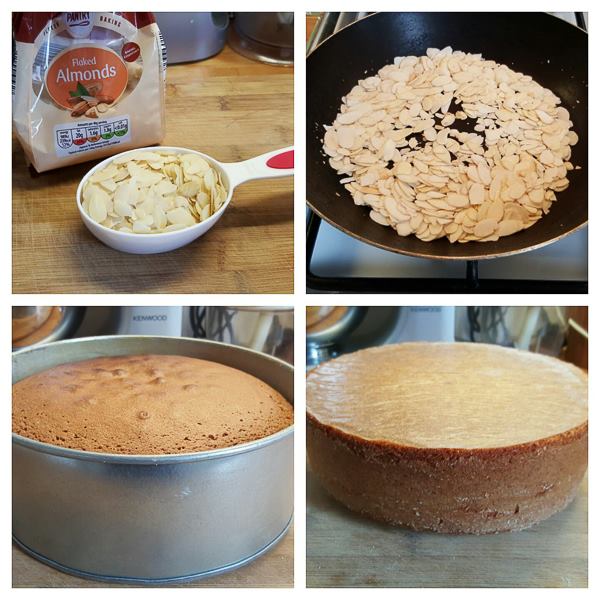
While the cake bakes, measure half a cup of sliced almonds and gently toast in a pan until light golden brown. Set to one side to cool.
Once your cake has baked, allow it to cool for 30 minutes in the cake tin before removing. Using a knife loosen the edge of the cake and release the cake from the tin.
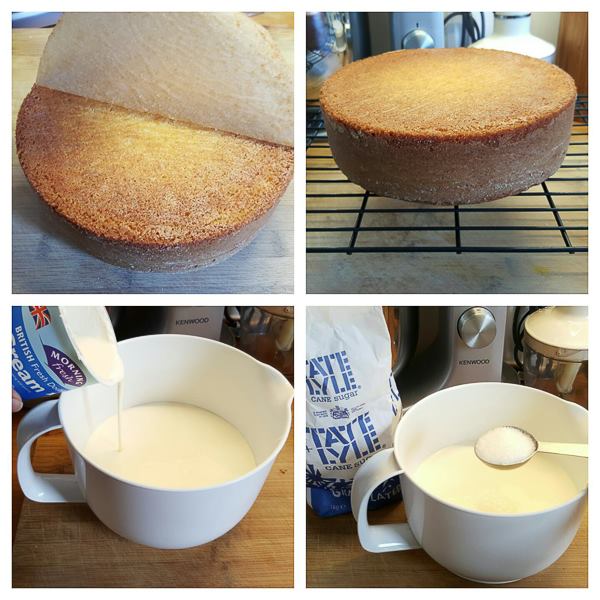
Remove the greaseproof paper gently, if the cake is still hot the paper will pull away the bottom of the cake so make sure the cake is warm or cold before removing. Allow the cake to cool completely on a cooling rack. The cake can take between 2 -3 hours to cool, only start to prepare the whipped cream after it has cooled completely.
In a clean bowl pour 2 pots of double cream and add 4 tbsp of sugar.
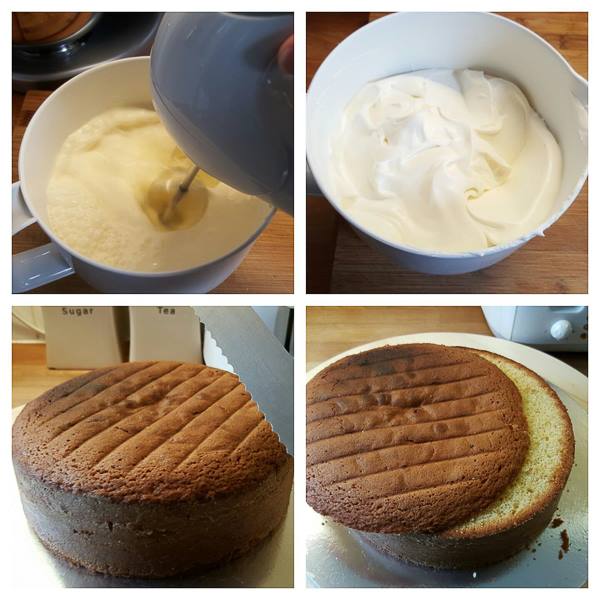
Whisk the double cream till it is firm (top right photo).
To achieve a level cake remove the top using a serrated knife. This process is much easier if you have a rotating cake table or lazy susan to place the cake on.
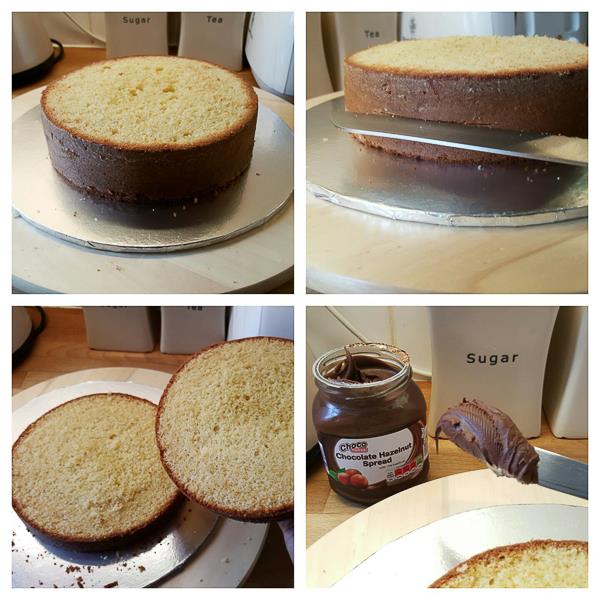
After removing the top, halve the cake through the middle. Again use a serrated knife and rotating cake table if you have one. Once the cake is halved spread chocolate hazelnut spread over the bottom layer of the cake.
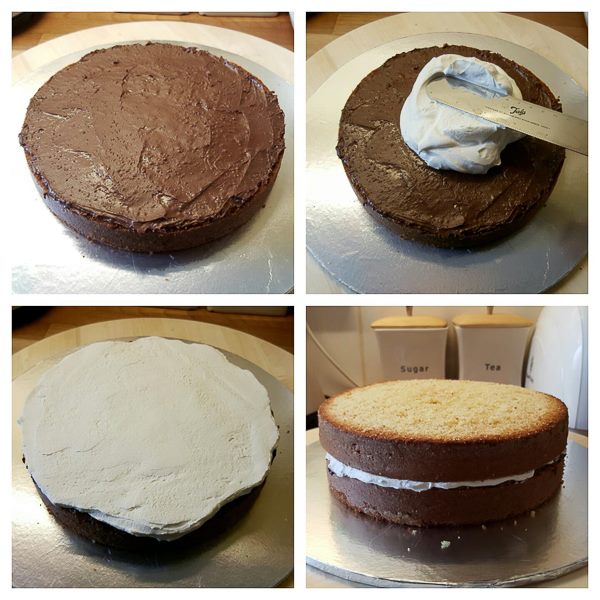
Apply the chocolate spread generously as the weight from the top layer tends to flatten the middle filling. Next take a generous amount of the whipped double cream and using a palette knife spread evenly. Place the top sponge layer over the whipped cream. If you haven’t already done so, place your cake on a cake board now if you’re planning to make this for a special occasion.
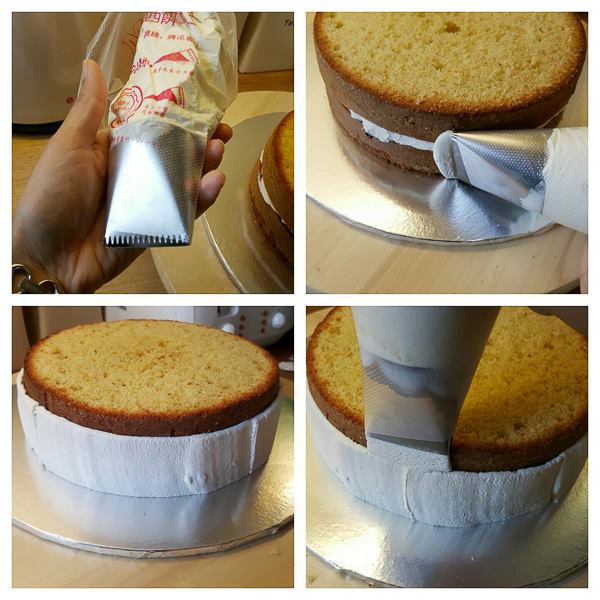
To cover the cake in fresh cream and avoid having to crumb coat it first (this just means to coat the cake in a thin layer of cream/buttercream to prevent crumbs falling) I’m using this extra large nozzle from Wilton, it’s their Cake Icer Tip No. 789. Fit the nozzle to a disposable piping bag and fill with the whipped fresh cream.
Keeping the cake and cake board on top of a rotating cake table, start piping the edge of the cake. Try not to stop in between if possible, don’t worry if you can’t do it in one go as you can smooth out any joins with a palette knife afterwards. Once the side is complete, proceed to cover the top starting along the middle.
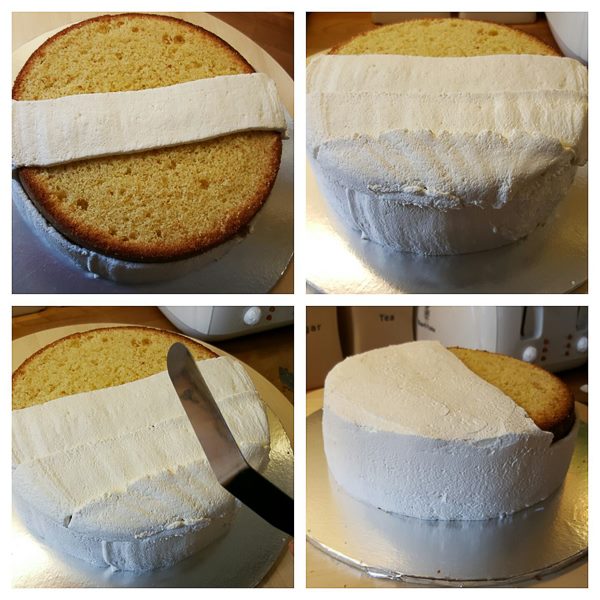
Continue piping cream either side of the centre. Using a palette knife smooth out any joins and lumps in the cream.
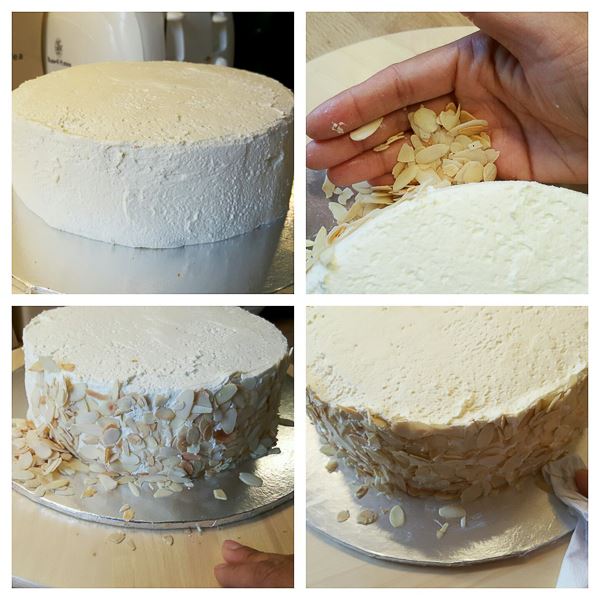
Once your cake is completely covered in whipped cream you can begin to add the toasted sliced almonds to the outside. Take a handful of almonds and gently press into the cream; you may find some fall off, just repeat the process and cover any gaps as you go. Once you are happy clean up any smudges with a clean paper towel.
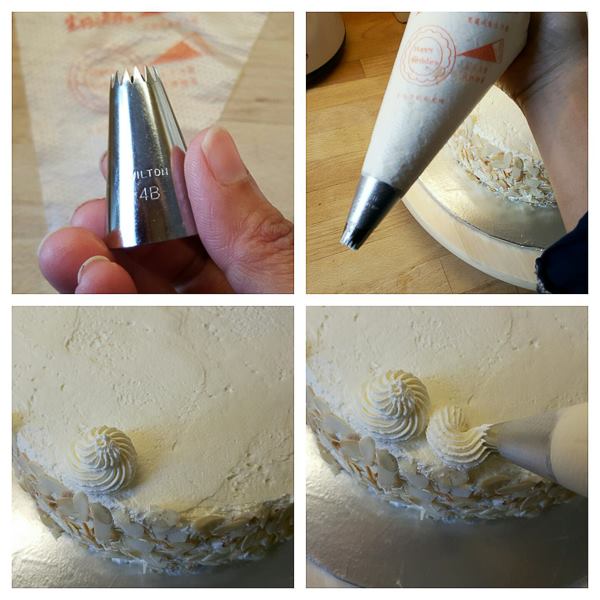
Take another small nozzle to pipe some swirls on top of the cake, I’m using a Wilton 4B. Fit the nozzle to another clean piping bag and fill with whipped cream. Hold the piping bag at a right angle to the cake (90 degrees) and pipe small swirls, tapering the top off.
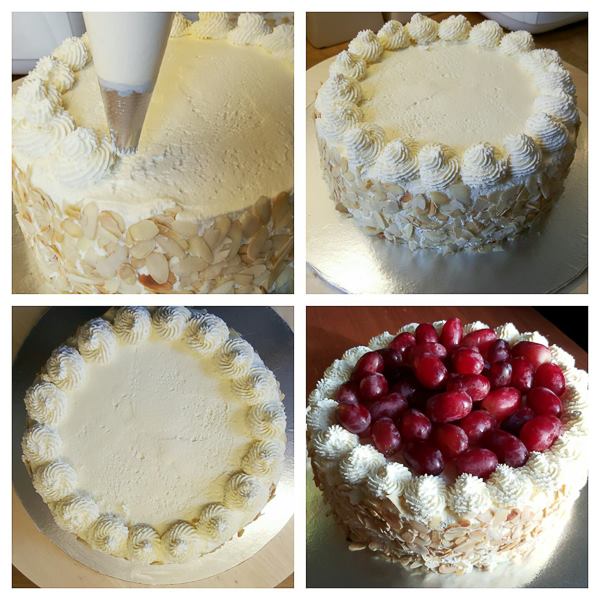
Continue piping swirls around the outer edge of the cake, the bottom left photo shows you what your cake should look like.
Fill the centre of the cake with your chosen fruit.
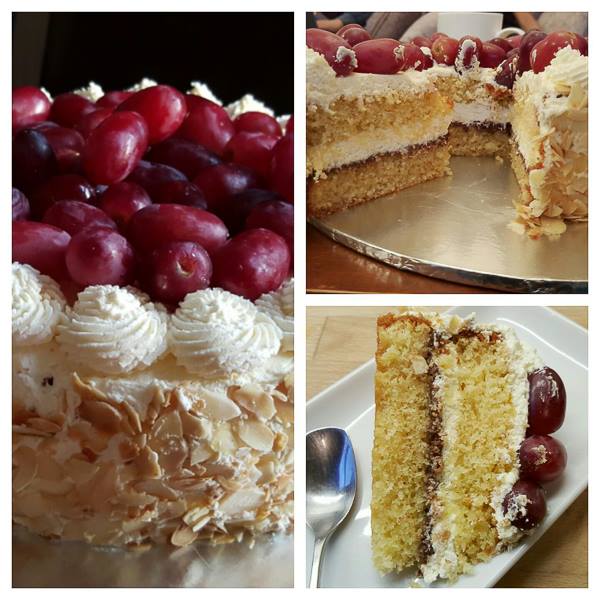
Enjoy your delicious Fresh Cream & Fruit Sponge Cake with your loved ones and a hot cup of tea.
Bon Appetit!
- 200g butter
- 200g sugar + 4 tbsp (for whipping cream)
- 4 medium sized eggs
- 2 tsp vanilla essence
- 200g self raising flour
- 2 tsp baking powder
- generous pinch of salt
- ½ cup of sliced almonds
- 2 pots of double cream (my pots were 250ml each)
- chocolate hazelnut spread
- fresh punnet of grapes OR fruit of your choice
- Start by preheating your oven to gas mark 4. Using your fingers grease the inside edge of an 8 inch cake pan with some butter. Take a small spoon of plain flour and gently coat the buttered surface, tap the tin to ensure you reach all the buttered area. I use greaseproof paper for the bottom of my cake as it gives a clean edge to the finished cake if you don't have greaseproof paper, grease and flour the bottom of your cake pan also.
- This is what the greased and floured cake tin will look like (top left photo). Cut out a circle of greaseproof paper using the base of your cake tin as a guide. Measure 200g of butter and 200g of sugar.
- Cream the butter and sugar together till soft, you shouldn't be able to feel the grittiness of the sugar.
- Add in the 4 eggs, one by one and thoroughly combine before adding each egg.
- Add 2 tsp of vanilla essence, mix well.
- Next sift in 200g of self raising flour and add 2 tsp of baking powder.
- Add a generous pinch of salt. With your handheld mixer turned off, stir in the flour, once most of the flour has been absorbed turn the mixer on and whisk thoroughly till you have a smooth batter (bottom left photo).
- Pour your cake batter into your cake tin; the cake tin I am using measures 8 inches wide and 3 inches high. Bake the cake in your preheated oven on gas mark 4 for approximately 40 - 50 minutes. The cake is cooked when a toothpick comes out clean from the centre of the cake.
- While the cake bakes, measure half a cup of sliced almonds and gently toast in a pan until light golden brown. Set to one side to cool.
- Once your cake has baked, allow it to cool for 30 minutes in the cake tin before removing. Using a knife loosen the edge of the cake and release the cake from the tin.
- Remove the greaseproof paper gently, if the cake is still hot the paper will pull away the bottom of the cake so make sure the cake is warm or cold before removing. Allow the cake to cool completely on a cooling rack. The cake can take between 2 -3 hours to cool, only start to prepare the whipped cream after it has cooled completely.
- In a clean bowl pour 2 pots of double cream and add 4 tbsp of sugar.
- Whisk the double cream till it is firm (top right photo).
- To achieve a level cake remove the top using a serrated knife. This process is much easier if you have a rotating cake table or lazy susan to place the cake on.
- After removing the top, halve the cake through the middle. Again use a serrated knife and rotating cake table if you have one. Once the cake is halved spread chocolate hazelnut spread over the bottom layer of the cake.
- Apply the chocolate spread generously as the weight from the top layer tends to flatten the middle filling. Next take a generous amount of the whipped double cream and using a palette knife spread evenly. Place the top sponge layer over the whipped cream. If you haven't already done so, place your cake on a cake board now if you're planning to make this for a special occasion.
- To cover the cake in fresh cream and avoid having to crumb coat it first (this just means to coat the cake in a thin layer of cream/buttercream to prevent crumbs falling) I'm using this extra large nozzle from Wilton, it's their Cake Icer Tip No. 789. Fit the nozzle to a disposable piping bag and fill with the whipped fresh cream.
- Keeping the cake and cake board on top of a rotating cake table, start piping the edge of the cake. Try not to stop in between if possible, don't worry if you can't do it in one go as you can smooth out any joins with a palette knife afterwards. Once the side is complete, proceed to cover the top starting along the middle.
- Continue piping cream either side of the centre. Using a palette knife smooth out any joins and lumps in the cream.
- Once your cake is completely covered in whipped cream you can begin to add the toasted sliced almonds to the outside. Take a handful of almonds and gently press into the cream; you may find some fall off, just repeat the process and cover any gaps as you go. Once you are happy clean up any smudges with a clean paper towel.
- Take another small nozzle to pipe some swirls on top of the cake, I'm using a Wilton 4B. Fit the nozzle to another clean piping bag and fill with whipped cream. Hold the piping bag at a right angle to the cake (90 degrees) and pipe small swirls, tapering the top off.
- Continue piping swirls around the outer edge of the cake, the bottom left photo shows you what your cake should look like.
- Fill the centre of the cake with your chosen fruit.
If you like the recipe please share with friends and family, also follow me on Facebook and Instagram. Questions? Leave a comment below or message me on Facebook.



Sarah
Can i use all purpose flour instead of self raising flour
afelia’s kitchen
You would need to add baking powder in that case. x
Sonia
Baking powder is already in the recipe with self rising flour.so we have to add more baking powder or what for all purpose flour???
afelia’s kitchen
Yes the recipe uses self raising flour and baking powder too.
Roobina
Hi sis, I really want to make this cake for my daughter’s birthday next week but wanted to check with you if this recipe yields a light and moist cake. Please let me know! Thanks
waseela
Amazing
Masuma
Most delicious cake I’ve ever made!!
Mum loved it 👌
afelia’s kitchen
Excellent!!! 😀 xx
Farhana
Hi sis. I made your cake today. It was such a easy recipe to follow. Moist and just perfect. I need to work on my cutting the cake and covering the cake with cream. But other then that perfect. Thank you so much.
Kolz
Hi
I was wondering if you use granulated or caster sugar.
The cake looks fantastic.
afelia’s kitchen
I use granulated sugar, thank you. 🙂
Syeda
Hi sis can jam be used instead of Nutella? And is this used so the cake doesn’t go flat
afelia’s kitchen
Hi, you can use jam instead, I did mention in the opening paragraphs that I use Nutella because that’s what my son prefers but you can use jam if you prefer. x
Taslima Begum
Hey sis, iv never baked a cake before in my life and this was my first try with your recipe and mashaAllah it came out perfect. My whole family enjoyed it very much. Thank you for the recipe. Xxx
afelia’s kitchen
Oh that’s excellent! I’m so happy your family enjoyed the cake, it’s one we adore too! 🙂 x
Saheda
Thanks sis for the reply! I also left a message on your instagram page just incase you didn’t see my message here! I will take your advice and give it another try inshallah. Just one more question.. if I was to make this recipe using a 6 inch tin how do I alter the ingredients? Is there a particular formula to be able to use a recipe and make it in different size tins? Thanks xx
afelia’s kitchen
I’m not sure that there is a way, at least I haven’t come across it! I think it would be too confusing trying to adjust recipes to fit certain tin sizes, it’s best to bake the cakes in the tin sizes suggested in the recipes. 🙂 xx
Saheda
How many cups of batter does this make? I am having problems with my sponge cake. Half of the cake inside remains slightly uncooked. Any tips why that might be happening sis? xx
afelia’s kitchen
Sounds to me like you’re undercooking the cake, make sure you preheat your oven for 10 minutes before placing the cake inside the oven and DON’T open the door until at least 50 minutes have elapsed. Next time try leaving it in the oven for 10 – 15 minutes longer, also are you using the same tin size as recommended in this recipe?
K
I’m so disappointed..twice I followed this recipe and twice it sunk in the middle and I’m not sure why.
afelia’s kitchen
Sorry you haven’t had success with this cake, maybe try leaving out the baking powder? Sometimes too much leavening agents can cause the cake to rise too quickly and then collapse, next time try leaving the baking powder out and see how that works. There are other factors like making sure your ingredients (butter and eggs especially) are at room temperature and not opening your oven door whilst the cake bakes, all these things affect the structure of the cake. Hope you have better luck in future.
Nafisa
This recipe was so simple to follow I have made this cake many times now as the family keep requesting it.. Thank you for posting this recipe.. I love it xx
afelia’s kitchen
You are most welcome, I’m thrilled the family love it as much as we do! ? xx